An entire climatarian Friendsgiving menu
My favorite food writers whipped up recipes for a satisfying (and sustainable) feast
We usually talk of nothing but dessert around these parts (because what else is there?), but today we’re doing something a little different. My buddies at
asked me to contribute a dessert recipe to a climatarian Thanksgiving menu that’s designed for you to pick and choose from, or cook in full, next week. I developed a pumpkin spice latte cheesecake — plant-based — because of my undying conviction that climate cuisine is incomplete without a vast array of silly little treatsTM reinterpreted as desserts. Some of my very favorite food writers and cookbook authors on Substack contributed the rest of the plant-forward recipes. It’s a party, y’all. Dig in.You’re invited to our Friendsgiving potluck
Gabriella Vigoreaux & Corinne Iozzio
Hey hungry world-savers, and welcome to a special holiday edition of Cool Beans. We’re pleased to declare the era of one person cooking every dang dish on the Thanksgiving table over. Thank goodness: First, who wants to do all that work? And second, saving the planet is an all-hands-on-deck situation. The original meal was, after all, about coming together to celebrate the harvest with respect and reverence for the Earth, in keeping with enduring Indigenous traditions.
So today, with Friendsgivings more popular than they’ve ever been, we thought it only fitting to invite our favorite fellow Substackers to a virtual potluck. This crew of foodies have each shared a dish for a delectable and sustainable feast.
Whether you’re hosting this year or have a platter to deliver, there’s something to fill in any gap in the menu—from a main that puts turkey in the rear-view mirror to a crisp fall salad to a decadent dessert and perfectly fluffy dinner rolls.
The Main: Oyster Stuffed Mushrooms
from
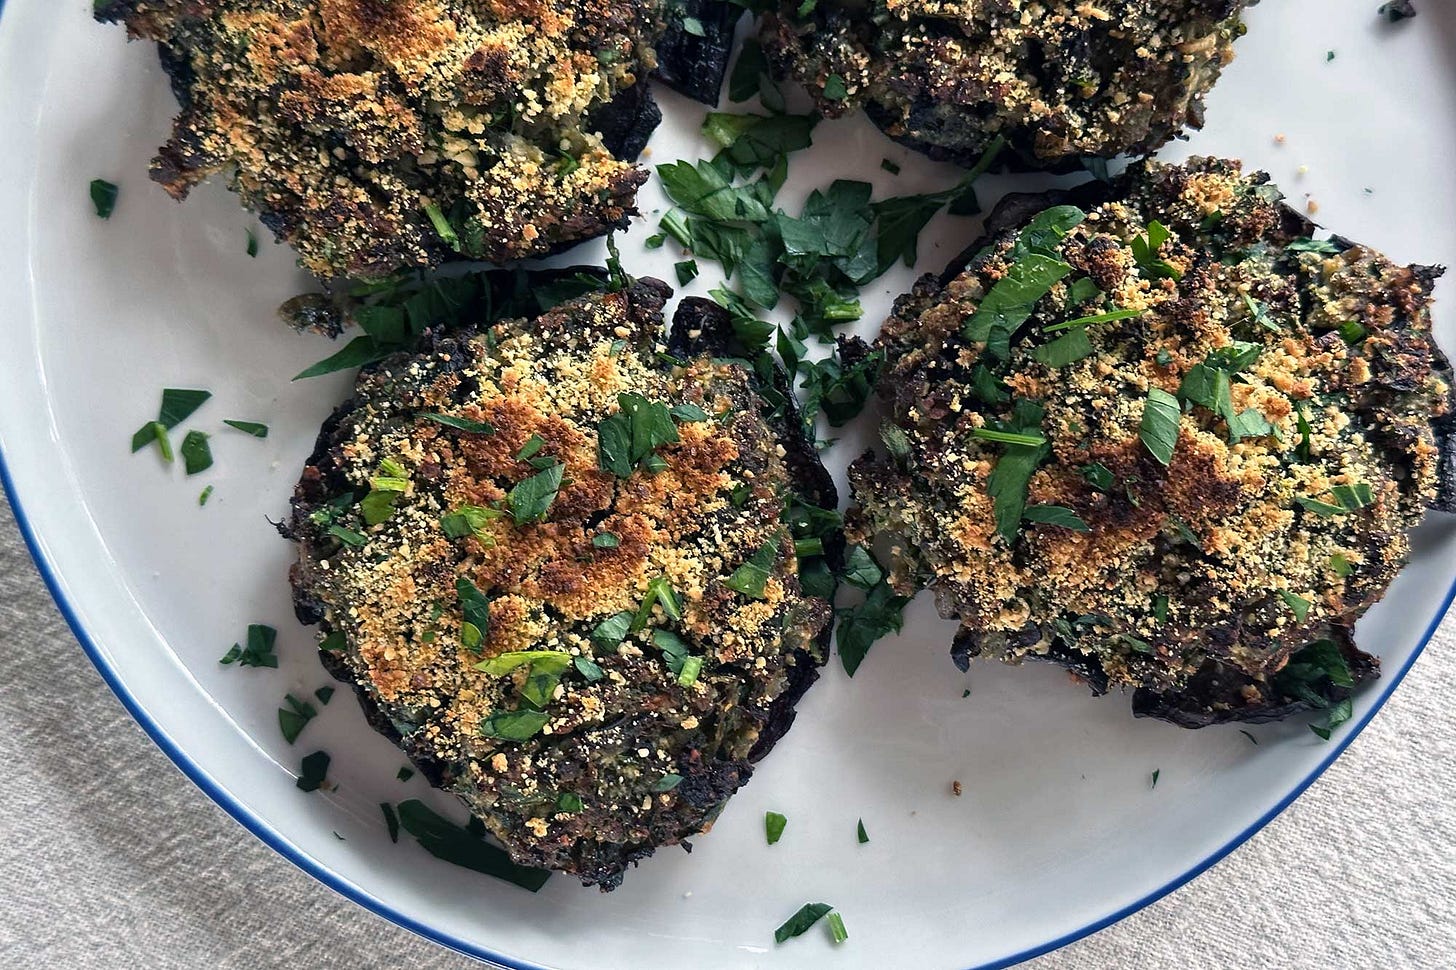
,“Turkey may be the centerpiece of the “classic” Thanksgiving spread, but historians aren’t absolutely sure it was there for the OG. In fact, depending on who you ask, oysters might have been a primary protein on that table: Scholars have at least documented them on the menu as far back as 1825. Eventually, oysters found their way onto Thanksgiving tables everywhere in the form of stuffing (or dressing, if you’re on that side of the debate). That’s about all the excuse I needed to tap as a means to make stuffing into the main event—as if it isn’t already. Not only are the briny bivalves one of the most sustainable proteins out there, they’re also high in glutamate (a key umami player), which means they add a super savory boost to these stuffed mushrooms.
To up the flavor ante, I blitzed up a plant-based Parm substitute out of two pantry staples, cashews and nutritional yeast. The recipe makes more “Parm” than you need, but it lasts several weeks in the fridge so you can have it on hand for sprinkling on pasta, rice, eggs, or whatever you’ve got The filling gets loaded into juicy portobello caps and broiled to crispy perfection. Flavorwise, it's a cross between a stuffed mushroom and a crab cake. What’s not to like?”
Yield: 4 servings
Ingredients:
Plant-based Parmesan:
3/4 cup raw unsalted cashews
1/2 cup nutritional yeast
1/2 teaspoon garlic powder
1/2 teaspoon salt
Stuffed Mushrooms:
4 large portabella mushroom caps (or 8 smaller ones)
2 tablespoons extra-virgin olive oil, divided
1 shallot, finely chopped
2 garlic cloves, finely chopped
1/4 teaspoon kosher salt
2 teaspoons chopped fresh thyme
10 ounces freshly shucked or canned oysters, drained and chopped
¼ teaspoon cayenne pepper
¼ cup white wine
¼ cup breadcrumbs
⅓ cup plus 1 tablespoon plant-based Parmesan
1/4 cup parsley, finely chopped, plus more for garnish
Procedure:
Preheat the oven to 400 degrees.
Make the faux parm. Add cashews, nutritional yeast, garlic powder, and salt to a food processor and pulse until finely ground. Reserve 1/2 cup for the recipe and store the rest in the refrigerator where it will last for several weeks.
Remove the stems from 4 large portobello mushrooms; chop and set aside. Use a spoon to scrape out the gills and discard. Brush the mushrooms all over with 1 tablespoon olive oil and season with 1/2 teaspoon salt. Place the ‘shrooms on a rimmed baking sheet stem-side down and roast until they start to soften, about 10 minutes. Remove from the oven, blot any excess liquid with a paper towel and set aside while you make the filling.
In a large skillet, heat the remaining 1 tablespoon olive oil over medium heat. Add the shallot, garlic, chopped mushroom stems, and 1/4 teaspoon salt and saute until translucent, 3 to 4 minutes. Add the thyme, chopped oysters, and cayenne and saute 2 to 3 more minutes. Add the white wine and cook, scraping up any bits that may have stuck to the bottom of the pan, until evaporated. Remove from the heat and transfer oyster mixture to a small bowl. Stir in the breadcrumbs, faux Parmesan, and parsley and mix to combine.
Stuff the mushroom caps evenly with the filling and sprinkle with 1 tablespoon of your plant-based Parm. Return to the oven and bake for 12 minutes more until the filling starts to turn golden brown. Broil for 1 minute to crisp up the top.
Sprinkle with parsley and serve warm.
Notes and Substitutions:
If using fresh oysters, save the oyster “liquor” and add to the skillet with the wine.
If you have any extra filling, it makes a delicious topping for crackers while you wait for your mushrooms to cook.
The Savory Veggie: Garlicky Blistered Green Beans
from
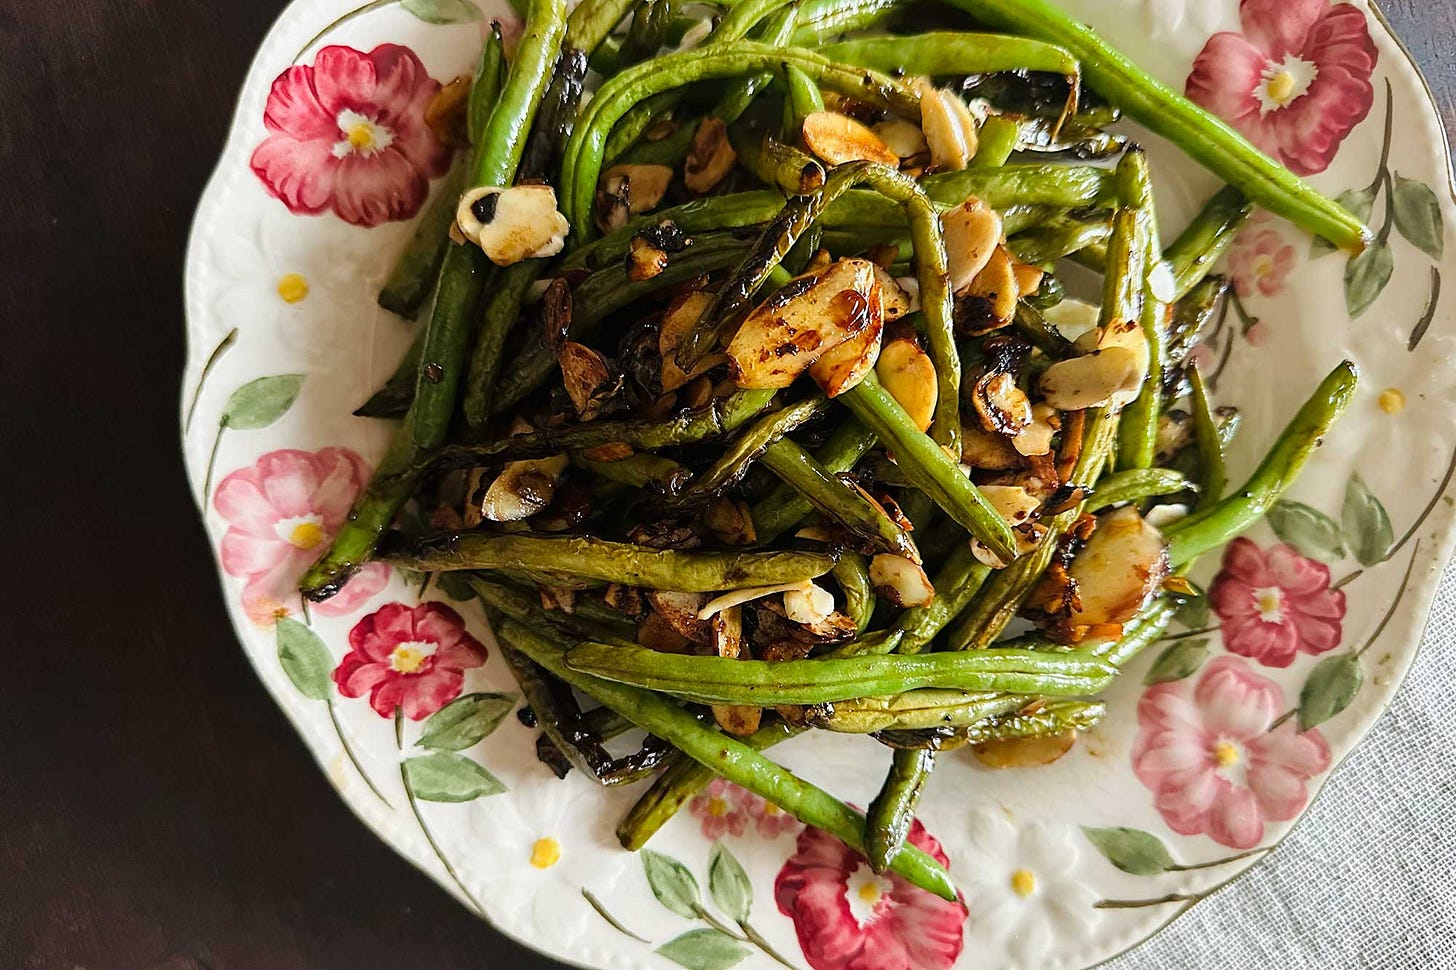
,“This umami-smothered riff on a Turkey Day classic mixes what you’d expect in a mainstay green with a little something extra. In it, string beans blister-to-black over high heat, creating a crunch similar to a Sichuan-style side dish, before getting doused in a flavorful blend of soy, balsamic, and butter. We know you’re gonna ask: Yes, there are still almonds.”
Yield: 4 servings
Ingredients:
2 tablespoons extra-virgin olive oil
1 pound green beans or haricot verts
Kosher salt, to taste
6 garlic cloves, smashed with the side of your knife
¼ teaspoon red pepper flakes
1 tablespoon balsamic vinegar
1 tablespoon soy sauce
1 tablespoon unsalted butter, plant-based if you’ve got it
2 tablespoons thinly sliced almonds
Procedure:
Warm the oil in a large skillet over high heat. Add the beans in an even layer and let them sit for 3 minutes. Shake the pan, and let them sit for another 3 minutes. We are trying to blister them, so they need contact with the pan. Don't stir!
Once blistered, add the smashed garlic cloves and a big pinch of salt and red pepper flakes. Stir frequently for 1 minute.
Turn off the heat, then stir in the balsamic, soy sauce, and butter until they coat the beans. Stir in the almonds.
Serve immediately or at room temperature. If refrigerating for later, don't add the almonds until the last minute.
Notes and Substitutions:
You don’t need to de-stem green beans; let people do that themselves if they care.
If you don’t have almonds, hazelnuts are a good sub—or really any nut you’ve got.
The Sweet Veggie: Sweet & Sour Yams
from
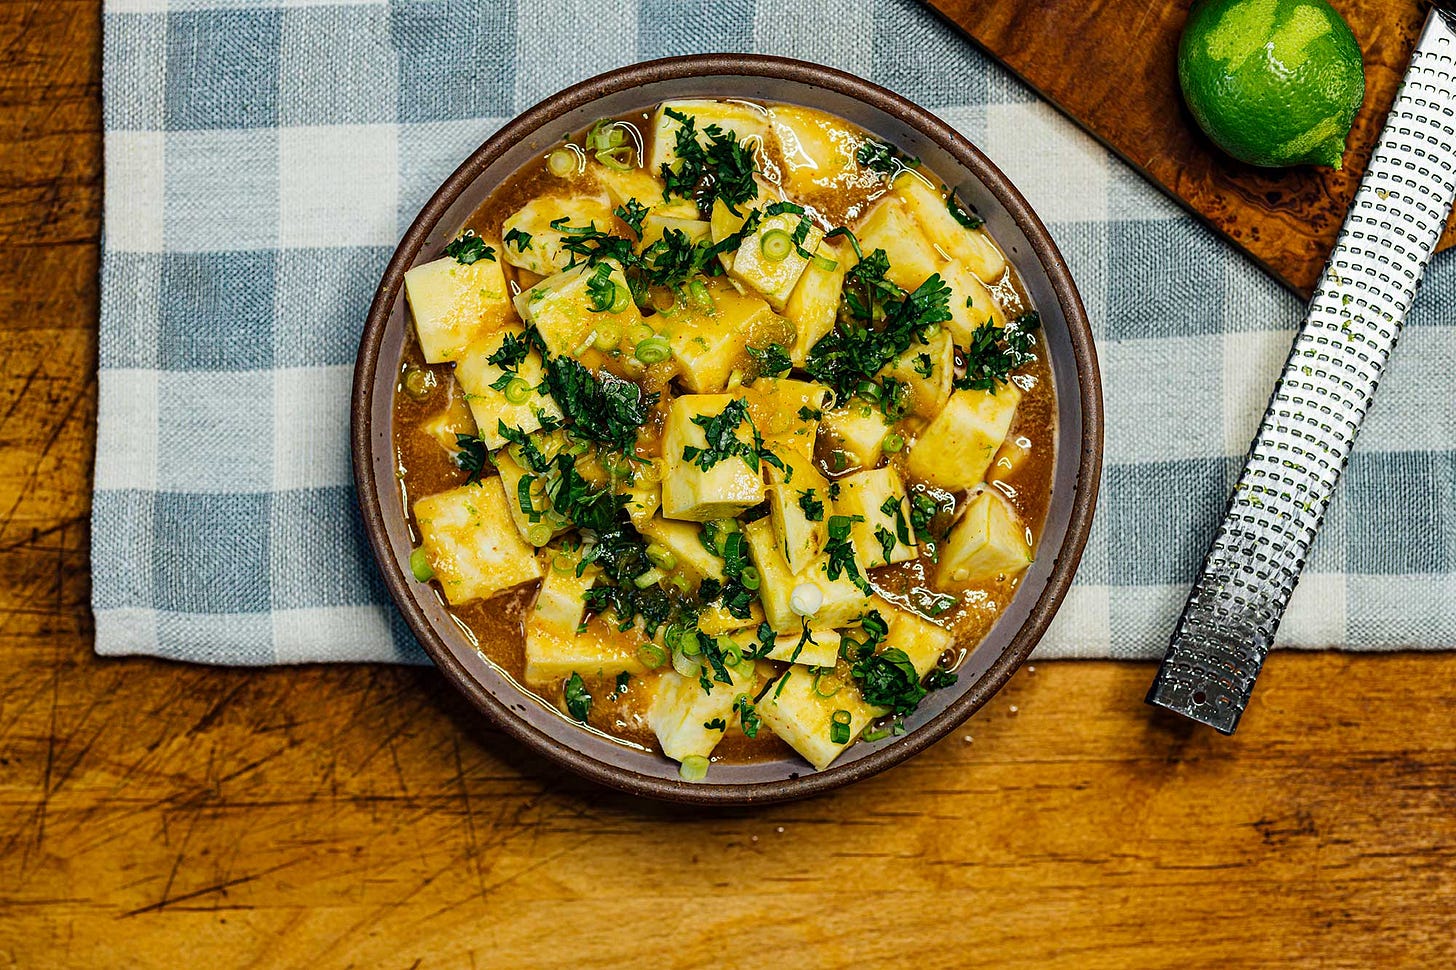
,“When I was working on a way to make sweet, candied yams, they just didn’t hit the way candied sweet potatoes do. Eventually I concluded that the candied dish works beautifully with sweet potatoes because they’re naturally, well, sweet. It’s a completely different story when fruity, sour flavors come in with a bit of heat and sweetness, as they do in this recipe for sweet and sour yams—from Veg-Table: Recipes, Techniques + Plant Science for Big Flavored, Vegetable-Focused Meals. In it, a double-shot of acid from vinegar and pineapple brings a much-needed dose of sharpness to counterbalance the sweetness. This is a good side for cooler weather, but also at home at a summer barbecue.”
Yield: 4 servings
Ingredients:
1 ½ pounds yams, peeled and cut into ½ inch cubes
2 tablespoons extra virgin olive oil
Fine sea salt, to taste
½ light brown sugar, packed
½ cup rice vinegar
1 cup diced pineapple
1 teaspoon fish sauce or liquid aminos
2 tablespoons fresh lime juice
1 teaspoon red pepper flakes
2 scallions, whites and greens, thinly sliced
2 tablespoons chopped cilantro
Zest of 1 lime
Procedure:
Preheat the oven to 350 degrees. Line a baking sheet with foil.
In a large bowl, toss the yams with the extra-virgin olive oil and fine sea salt. Spread on the prepared baking sheet. Cover with a second layer of foil and crimp the edges to form a tight seal. Bake for 30 minutes.
Flip the yam pieces with a silicone spatula (don’t bother with a pair of kitchen tongs; there are too many pieces to turn). Bake, uncovered, for another 30 to 45 minutes, until golden brown and crisp. Remove and transfer to a serving bowl.
While the yams roast, add to a blender or food processor the light brown sugar, rice vinegar, pineapple, fish sauce or liquid aminos, lime juice, and red pepper flakes (use a hot variety). Pulse at high speed until smooth. Taste and season with fine sea salt.
Transfer the sauce to a small saucepan and bring to a boil over medium-high heat. Remove from the heat, pour the hot sauce over the hot cooked yams, and fold to coat. The yams will become firm when roasted, and once the hot yams meet the sauce, they will suck up almost all the liquid like a sponge.
Garnish with scallions, chopped cilantro, and lime zest. Serve immediately.
Store leftovers refrigerated in an airtight container for up to 3 days.
Notes and Substitutions:
If you can’t find yams, swap in russet potatoes or carrots. Sweet potatoes will also work.
Use a hot variety of red pepper flakes, not the gentler Aleppo, Maras, or Urfa.
For my friends who like things saucier in life, double the quantity of the sauce. Use the amount listed in the recipe and then serve the extra on the side.
The Salad: Shaved Apple & Fennel Salad
from
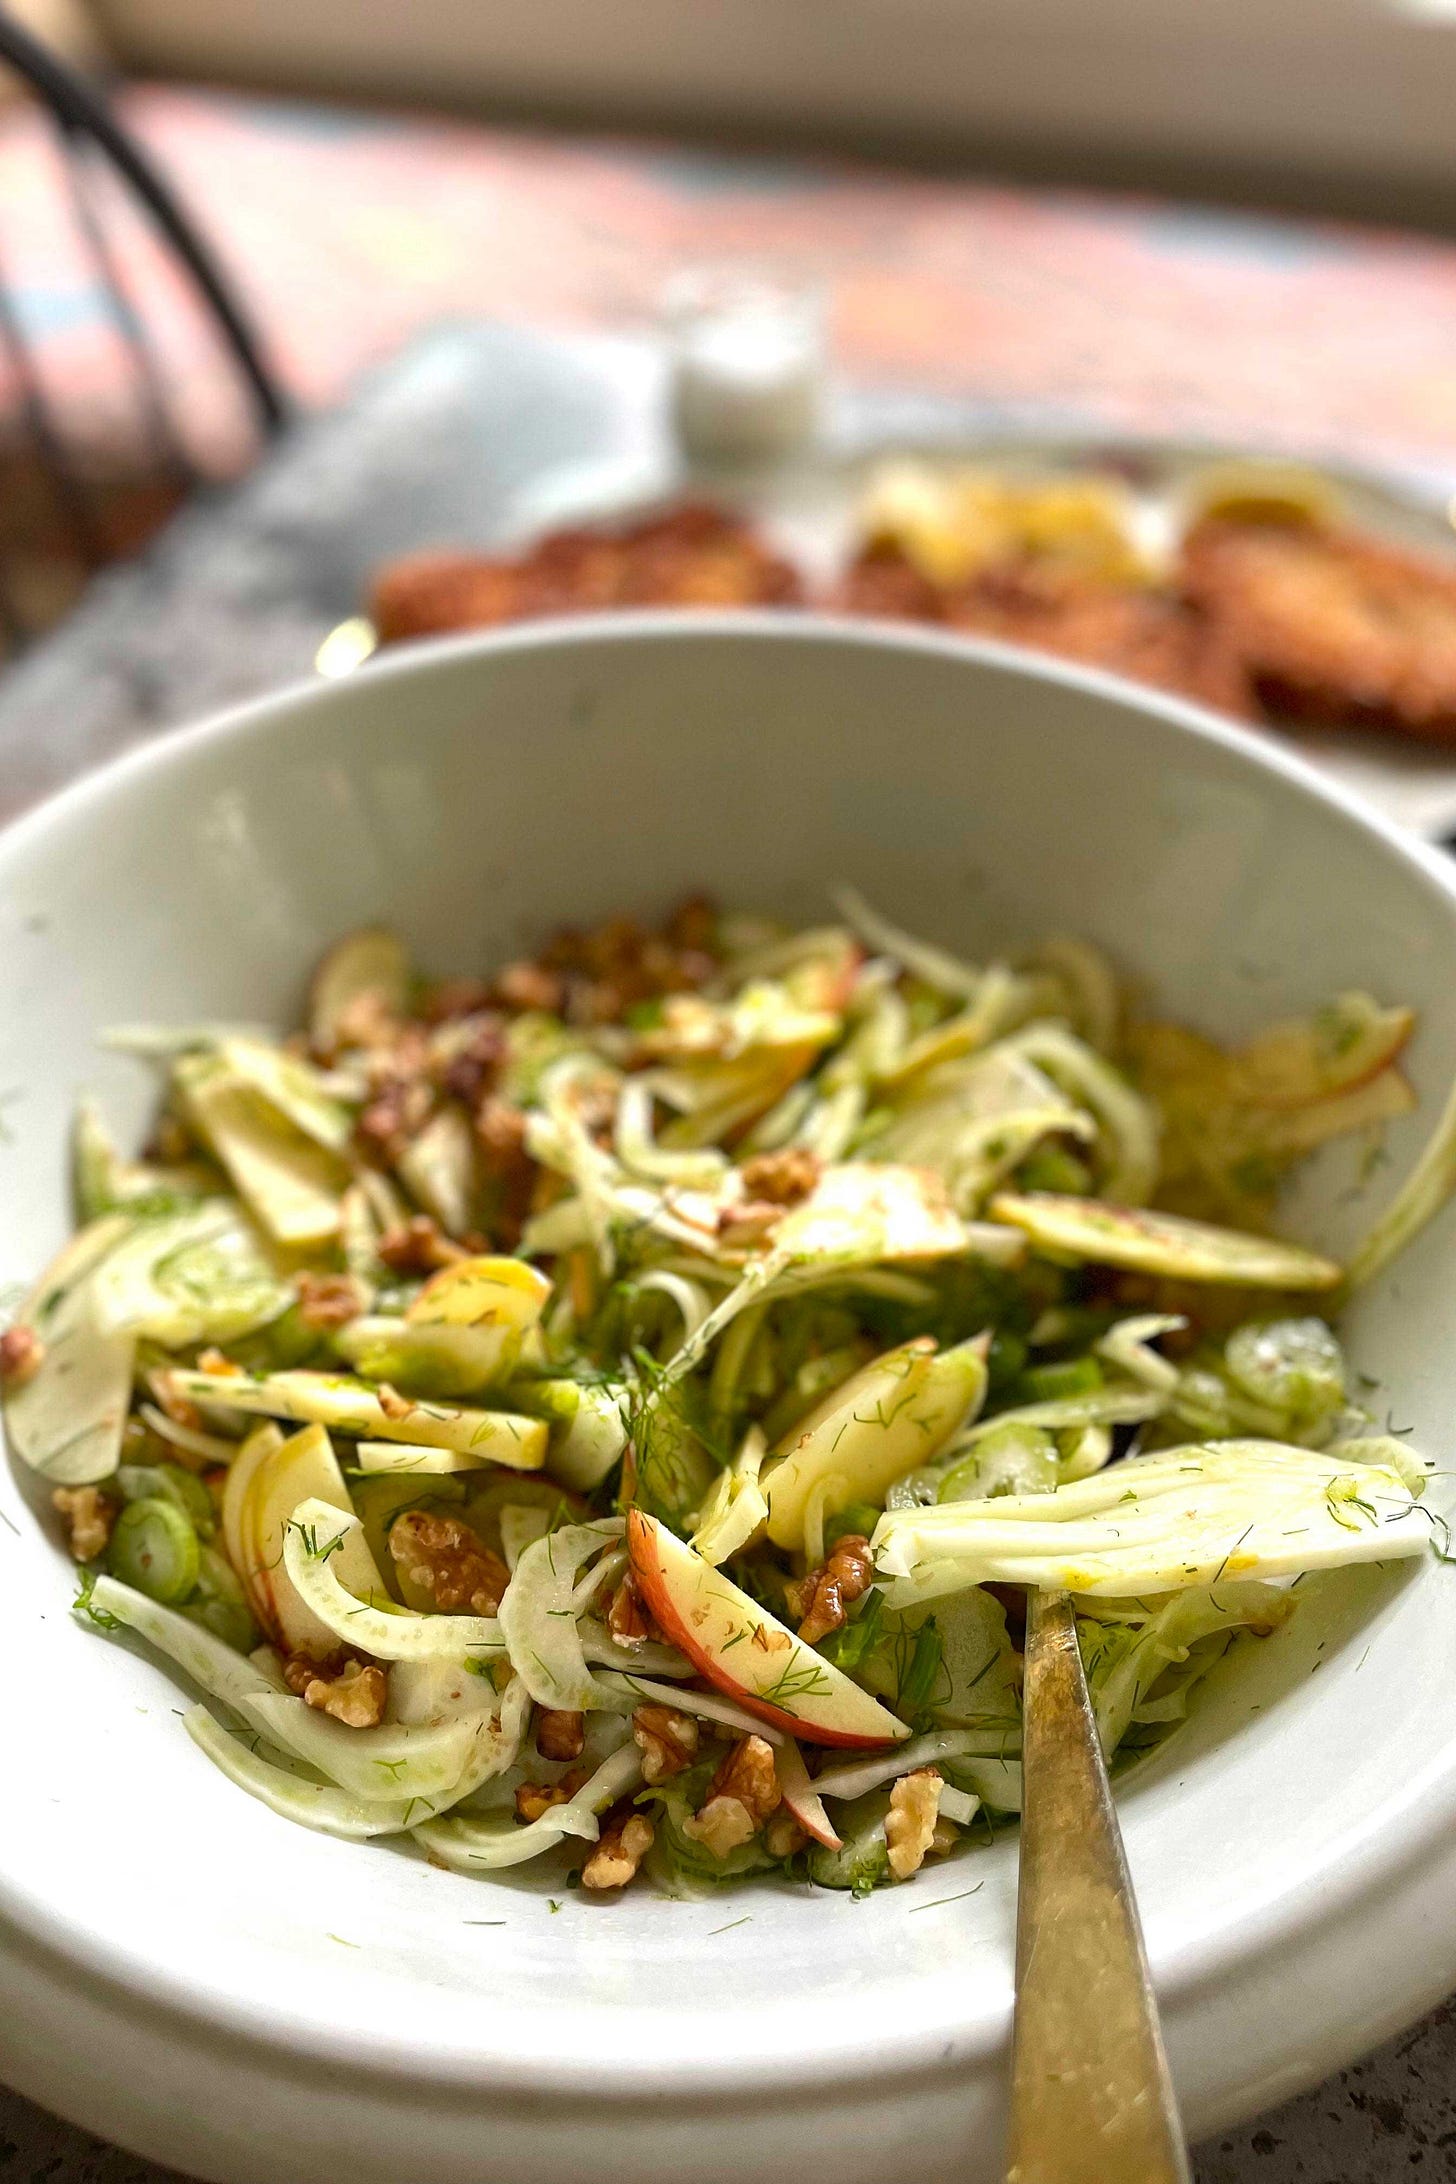
,“Not every salad has to have lettuce; a lot of my favorite salads don’t. Take this combination of thinly sliced fennel and apples dressed simply with olive oil, lemon, and a tiny bit of something sweet (honey or maple syrup). It’s great for entertaining since there’s no lettuce that’s prone to wilting. You can make it a few hours before you serve it. This kind-of slaw-like salad is ideal served with anything a little rich that could use some crunch and acidic brightness to balance everything out.”
Yield: 4 servings
Ingredients:
1/4 cup extra-virgin olive oil
2 tablespoons lemon juice
1 teaspoon honey or maple syrup
A large pinch kosher salt
1 large head fennel, any browned outer layers removed
1 large apple (preferably something tart), stemmed and seeded, thinly sliced
1/2 cup toasted nuts (whatever you’ve got)
Procedure:
Place the olive oil, lemon juice, honey, and salt in a large bowl and whisk well to combine.
If your fennel has the fronds and long stems attached, remove them and roughly chop the fronds and thinly slice the stems (as if each was a celery stalk). Thinly slice the fennel bulb.
Add all of your fennel and apple to the bowl with the dressing and toss well to combine. Top with the nuts. Serve!
Notes & Substitutions:
Play around with the ingredients based on what you have. Firm veggies like carrots, kohlrabi, celery, or peeled raw beets can sub for fennel; pears (even citrus) can stand in for apples; and vinegar (maybe apple cider or sherry) can swap for lemon juice.
Additions are also welcome: Try something briny like olives or capers, or toss in a cooked grain or legume like quinoa or lentils to make the dish more substantial.
The Dessert: PSL Cheesecake
from
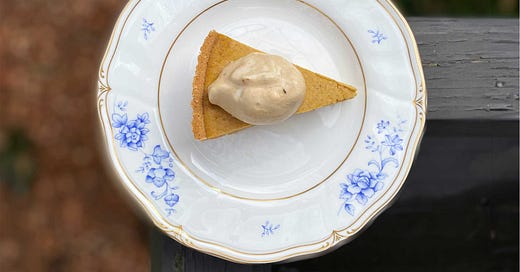
,“Fellow basic climatarians, your trusty autumnal PSL is here—now in plant-based cheesecake form. The pumpkin spice filling is inspired by a Nora Cooks recipe and that moment when the first sip of the season touches your flannel-clad soul. The coffee whip is like the latté foam that follows, and it’s the jolt you need after a big meal. (We see you, tryptophan, and we raise you dessert.)
I sized this cheesecake to fit in a 10- or 9-inch pie dish, so you don’t need a springform pan and won’t have too many leftovers. Make it a day ahead so it can chill in the refrigerator overnight. If you’re short on time, a store-bought graham cracker crust speeds things up. Do try to get Tofutti cream cheese if you can: It yields the silkiest results and makes the spiced flavors shine like your round belly after a second (or third) slice.”
Total time: 1.5 hours, plus chilling
Yield: 8-10 servings
Ingredients:
Graham cracker crust
180g (12 sheets) Nabisco graham crackers
39g (3 tablespoons) light or dark brown sugar
84g (6 tablespoons) plant-based butter, melted and cooled
½ teaspoons kosher salt
Pumpkin spice cheesecake filling
340g (12 oz) Tofutti cream cheese
208g (1 cup) coconut cream
230g (1 cup) pumpkin purée
107g (½ cup) light brown sugar
19g (2 tablespoons) cornstarch
6g (2 teaspoons) pumpkin pie spice mix
5g (1 teaspoon) vanilla
5g (1 teaspoon) lemon juice
Coffee whipped cream
170g (6 oz) store-bought canned vegan whipped cream
3g (1 teaspoon) instant espresso powder
4g (1 teaspoon) sugar
Procedure:
Preheat the oven to 350 degrees. If you’re making your own crust, spray a 10- or 9-inch pie dish lightly with oil.
To make the crust, pulse the crackers in a food processor until they’re crumbs. Then combine the crumbs, melted butter, salt, and brown sugar in a bowl, mixing with a fork until the mixture resembles wet sand. Press evenly into the bottoms and sides of the pie dish, using a spoon to help you level it.
To prepare the cheesecake filling, first mix the cream cheese in a stand mixer fitted with the paddle attachment until it’s very smooth. Then add the coconut cream, pumpkin puree, brown sugar, cornstarch, spice, vanilla, and lemon juice and mix again until completely smooth, scraping down the sides and bottom of the bowl as needed. Pour the filling into the prepared crust.
Place the pie dish on the middle rack of the oven, and bake for 35 to 40 minutes—no longer—just until the outer inch of the filling is jiggly and puffed. The rest will look very liquidy, but it will firm up. Turn off the oven and, with the door closed, allow the cheesecake to keep gently cooking in the oven’s residual heat for another 20 minutes.
Remove the cheesecake from the oven and let it cool to room temperature. Refrigerate for at least 6 hours, or preferably overnight, to let it set all the way through.
When you’re a few minutes away from serving, prepare the coffee whip (it’s like a cross between whipped cream and latté foam, so it holds its shape well for about ten minutes). Squirt a blob of canned vegan whipped cream into a bowl. Add the espresso powder and sugar and mix with a fork until well combined. Allow the mixture to sit a minute to let the espresso powder dissolve, then mix again. Squirt the remaining whip into the bowl and, using a spatula, fold it gently together with the coffee mixture. Place a dollop on each cheesecake slice and serve.
Leftover cheesecake keeps for up to 5 days, tightly wrapped in the fridge.
Notes and Substitutions:
Nabisco graham crackers are vegan. You can also use a store-bought crust: The Keebler 10-inch is perfect—and happens to be vegan. You can also use the 9-inch one, but it’s a tad smaller than it advertises, so you should remove 1 cup of filling. You can divide that leftover filling between three greased ramekins and bake for 10-12 minutes to make three snack-sized, crustless cheesecakes.
Tofutti cream cheese creates the most flavorful and silkiest results, apparently because of its high soy content. If you can’t find it, Oatly cream cheese will create similar results (you may just want to add a pinch of extra pumpkin spice). Barring that, Kite Hill also works, but creates a denser cheesecake. Whatever you do, avoid offerings high in coconut oil such as the Trader Joe’s variety, Violife, and Miyoko’s: they create soupy drama you simply do not need.
Coconut cream: Be sure to grab a can of coconut cream rather than its cousins coconut milk or heavy coconut cream. Coconut cream has just the right amount of fat for this cheesecake.
The Bread: Maple-Glazed Brioche Buns
from
,“I am a big dinner roll fan, but these might just be my favorite ones I’ve ever created. I swap out the granulated sugar for maple sugar in my go-to brioche dough, proof them into puffy pillows, then bake them to a burnished golden brown. The final touch is a mirrored sheen of maple syrup, a sweet contrast to the crunchy flaky sea salt on top. I guarantee they will be the star of your Thanksgiving table!”
1 hr active time, 12 hrs total time (includes overnight chilling)
Yield: 12 rolls
Ingredients:
Sweet Poolish
60 g (1/2 cup) bread flour
60 g (1/4 cup) unsweetened soy milk
10 g (2 tsp) organic granulated sugar
0.75 g (1/4 tsp) instant yeast
Tangzhong
20 g (2 tbsp + 2 tsp) bread flour
100 g (1/4 cup + 3 tbsp) unsweetened soy milk
Brioche Dough
1 recipe Sweet Poolish
1 recipe Tangzhong
390 g (3 1/4 cups) bread flour
180 g (3/4 cup) unsweetened soy milk
50 g (1/4 cup) vegetable oil
6 g (2 tsp) instant yeast
67 g (1/3 cup) organic granulated sugar
9 g (1 tbsp) kosher salt (Diamond Crystal or see note below)
169 g (3/4 cup) unsalted, cultured-style vegan butter (e.g. Miyoko's), chilled and diced
Egg wash
30 g (2 tbsp) liquid vegan egg substitute (JUST Egg recommended)
10 g (2 tsp) unsweetened soy milk
Flaky sea salt (e.g. Maldon), for sprinkling
Maple syrup, for brushing
Procedure:
Prepare and proof the Sweet Poolish
Combine all the ingredients in a small bowl and mix thoroughly.
Cover with plastic wrap and proof at 82 degrees for 4 hours. I recommend using a countertop proofer to keep the temperature consistent, but if you don’t have cover it tightly and keep it in a warm spot in your kitchen.
Prepare and cool the Tangzhong
Combine ingredients in a small saucepan and cook over medium heat, whisking constantly, until the mixture reaches 150 degrees and it has thickened.
Remove the mixture from the heat; pour into a small bowl, cover tightly with plastic wrap, and allow it to cool to room temperature.
Make and chill the Brioche Dough
Knead all ingredients except sugar, salt, and butter on low speed for 5 minutes.
Increase the speed to medium-low and slowly stream in the sugar and salt; knead for a total of 5 minutes at this speed.
Increase the speed to medium and add the butter slowly, one piece at a time; knead for a total of 4 minutes.
Stop the mixer and rest the dough for 2 minutes; scrape down the sides of the bowl in the meantime; this aids in gluten formation without overheating the dough.
Restart the mixer on medium speed and continue kneading for 8 minutes more. The dough will at first be greasy and loose, then it will get stickier and more cohesive, and then finally it will unstick from the bowl and be very smooth, shiny, and taut.
Perform the "windowpane test" by stretching a small bit of dough between your fingers; if it stretches thin enough to be translucent (hence "windowpane") without breaking, the dough is ready to proof. If not, continue kneading on medium speed in 1-minute increments until it passes this test.
Place the dough on a small, lightly oiled sheet pan and press it into a rectangle. Fold each side into the center and flip the dough over, so the smooth side is up; press it down gently; cover with plastic wrap.
Proof the dough at 82 degrees for 1 hour.
Place the dough in the fridge to chill for at least 2 hours, ideally overnight.
Shape and proof the buns
Turn the dough top side down onto a lightly floured countertop and press lightly to de-gas.
Divide the dough into 12 pieces of roughly 90 grams each; cover them with plastic while you work.
Lightly re-flour one portion of your countertop and leave another portion of the counter clean.
Pre-shape the buns into a ball by placing one piece top side down on the floured portion of the counter; press lightly to flatten it out, then fold each of the edges of the dough into the center, pressing down to seal them in place.
Turn the piece of dough over onto the clean portion of the counter and cup the dough from underneath with the heels of your palms; press the heels together beneath the dough and move them in opposite directions so that you pinch the seam underneath and rotate the piece of dough; it will become more and more of a ball shape.
Finally, cup your hand over the ball of dough and rotate it against the counter so that the seam underneath catches on the counter and the surface of the dough becomes even tauter.
Turn the ball over and give the seam a final pinch to seal
Repeat steps 4-7 with all the pieces of dough, then cover them with plastic and let them rest for 20 minutes.
Meanwhile, lightly grease a 13-by-9-inch rectangular baking dish with cooking spray and line it with parchment paper.
Once the dough balls have rested, place them top side up in the prepared pan.
Cover the pan loosely with plastic and proof at 82 degrees for 2.5 hours, until the balls have roughly doubled in size and they are snugly touching.
Bake and finish the buns
While the buns proof, preheat the oven to 350 degrees and position a rack in the center.
Combine the egg substitute and soy milk for the Egg Wash and brush each bun lightly with this mixture.
Sprinkle the buns with flaky sea salt and bake them until they are deep golden brown and the center bun registers 195 degrees in the middle, 30-35 minutes.
As soon as the buns come out of the oven, brush them with maple syrup; this will add a brilliant shine to the top.
Buns keep for up to 4 days on the counter wrapped tightly in plastic wrap; for the best eating experience, if consuming more than 12 hours after baking, reheat the buns in a 300-degree oven for about 10 minutes, until just warmed through.
Notes and Substitutions:
I use Diamond Crystal kosher salt, which has larger crystals than other kinds of kosher salt, normal table salt, or fine sea salt. As a result, when measured by volume (teaspoons/tablespoons) it will add less "saltiness" than an equal quantity of the other salts. If you are not using Diamond Crystal, I recommend measuring your salt by weight, in which case you won't run into this issue. Otherwise, use half the volume quantity of salt
I prefer cultured-style plant butters made from cashew, coconut, or other kinds of fats (e.g. Miyoko's) in recipes where the fat will caramelize, such as cookies, pie or tart dough, and bread. Also, cultured-style butter can be browned similarly to dairy butter.






So cool!!